


Featured in

Our Certuity Family Office is the first truly integrated service for Ultra High Net Worth Families to protect & grow wealth while preserving their legacy for the future.

Where’s the Gold online pokie is arguably the most popular Aristocrat slot ever – and, it’s now available online on CasinoHEX Australia.

All operations targeted at the creation, management, and evolution of a web store are covered under ecommerce website design and development.
Get a personalized proposal for your business requirements and the development cost determined before selecting an ecommerce development company.

Sitechecker is a platform with a user-friendly rank tracker and Google Search Console integration.
 A fully packed education WordPress theme for everyone who wants to create online courses, coaching, and language centers, eLearning platforms, and deliver knowledge worldwide.
If you don’t know where to buy bitcoin, make sure to check the best place to buy crypto in Canada before you make your decision.

With state of the art software, over 1000+ positive reviews, 700+ first-class game and bonus content, Pokiez is Australia’s #1 rated online gambling destination in the online casino scene. Our team promotes software that is easy to use, lacks lag or malware, viruses, spyware and bugs, making us one of the main attractions for online casino players. To get $1,000 on Sign Up, seek Pokiez Casino Help. We are trusted, safe and secure due to 128-bit SSL encryption used. Our platform offers the best gaming experience on both desktop and mobile devices, easy navigation, fast payouts and much more customized features to ensure your satisfaction.

A new Casino online in India – Bluechip.io. You will be able to get bonuses, make deposits in cryptocurrency and bet with the best service.


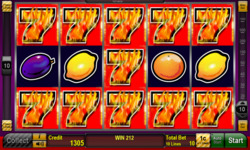 Sizzling Hot Deluxe is a refreshing, fun and colorful fruit machine from the Novoline range. With fresh visuals in the form of colorful fruit symbols as well as hot background graphics, the eye never gets bored.
Avenga is an experienced enterprise application development company that builds, customizes, and integrates business software such as ERP, CRM, SCM, and BPM systems. We enable firms to reshape workflows to become more nimble, efficient, and profitable.
Cost and efficiency
In most cases, the developer can solve the problem quickly. If you think that hiring experienced programmers is costly, think about it: the more experience a programmer has, the faster he will create a functional, accurate, reliable solution that will be easy to maintain. And this means lower costs in the long run.
In addition, the "cost of operation" of the program should also be taken into account: any software consumes computer resources, and they are not free. The developer will write an efficient program that will not use PC resources unnecessarily. To do this, he can apply, for example, caching of frequently used data - and this is just one of, probably, thousands of tools and methods that help to increase the efficiency and speed of the program.
Perhaps a novice programmer will provide a cheap solution, but working with this solution can cost you and your clients much more than if you immediately hired an experienced developer who is primarily looking for an effective solution.

Ease of use
Good software is designed with computer user experience (UX) in mind, and it's a pretty broad topic with a lot of research and results. The more lessons learned from these studies are taken into account, the better the software will be in use.
Let me give you a couple of examples so you can get a feel for why this is important:
Well-designed software in user input forms will not be case sensitive in the email field and will remove leading and trailing spaces. There is no need to make life difficult for users due to the fact that they have CAPSLOCK enabled: the email address is case-insensitive. If the program accepts new email addresses, check them in advance and inform the user in understandable language that he may have entered an incorrect address. This also means common mistakes - for example, the absence of the @ symbol - and less obvious ones: for example, the misspelling of the popular domain: "gmail.ocm"..
If the user needs to be redirected somewhere, a good program will remember the starting point and, after performing the necessary actions, will return the user there. She will also remember already known data and interactions that need to be associated with subsequent steps of the user. For example, suppose you searched Expedia for flights as a guest without logging in, and then decided to create an account. All previous searches in the new account will be saved, and you can use them from other machines.
Good software is developed taking into account the real scenarios of users in it. You can't just add some features - you need to put yourself in the user's shoes. I booked a United Airlines flight the other day and forgot to add my frequent flyer number. After receiving confirmation, I went to the United Airlines website to add this number to the flight, and it took me ten minutes. There was no obvious way to add this number, so I had to climb through all the links that, as it seemed to me, could lead to the desired functionality.